How to do Squarespace masonry gallery layout
A masonry gallery is a type of layout that arranges your images in a grid format with different sizes and ratios. This style of gallery allows for more flexibility in the layout and can make your images content more engaging.
In this post, I will guide you how to create a Squarespace masonry gallery via three different methods. The first 2 methods is free, and the last method is done by using paid Squarespace plugin.
Each method has its pros and cons, so you have the option to choose the method that best suits your needs and preferences. We will guide you through the step-by-step tutorials and provide you with all the information you need to generate a masonry grid gallery on your Squarespace website.
Squarespace masonry layout sample
By default, Squarespace supports a Masonry Gallery layout on Summary blocks and Gallery sections, on its Gallery blocks, only Grid layout with images of the same size and dimensions arranged uniformly.
Create Squarespace masonry gallery
Method 1: Using Summary block
With wall summary blocks, the images are displayed in a masonry-styled grid, this is built-in feature of Squarespace so you don’t have to pay for a Squarespace plugin and it can work with Personal plan!
Add Images to Blog: Upload images to a new or existing Blog post.
Insert Summary Block: Add a Summary block on a page, linking it to the Blog.
Set Layout: In the Design tab, choose "Wall" as the layout.
Adjust Columns: Under Design > Size and Spacing, tweak Column Width.
Step-by-step included on this post Reuse Gallery images with 7.1 Summary block
Method 2: Using Gallery section
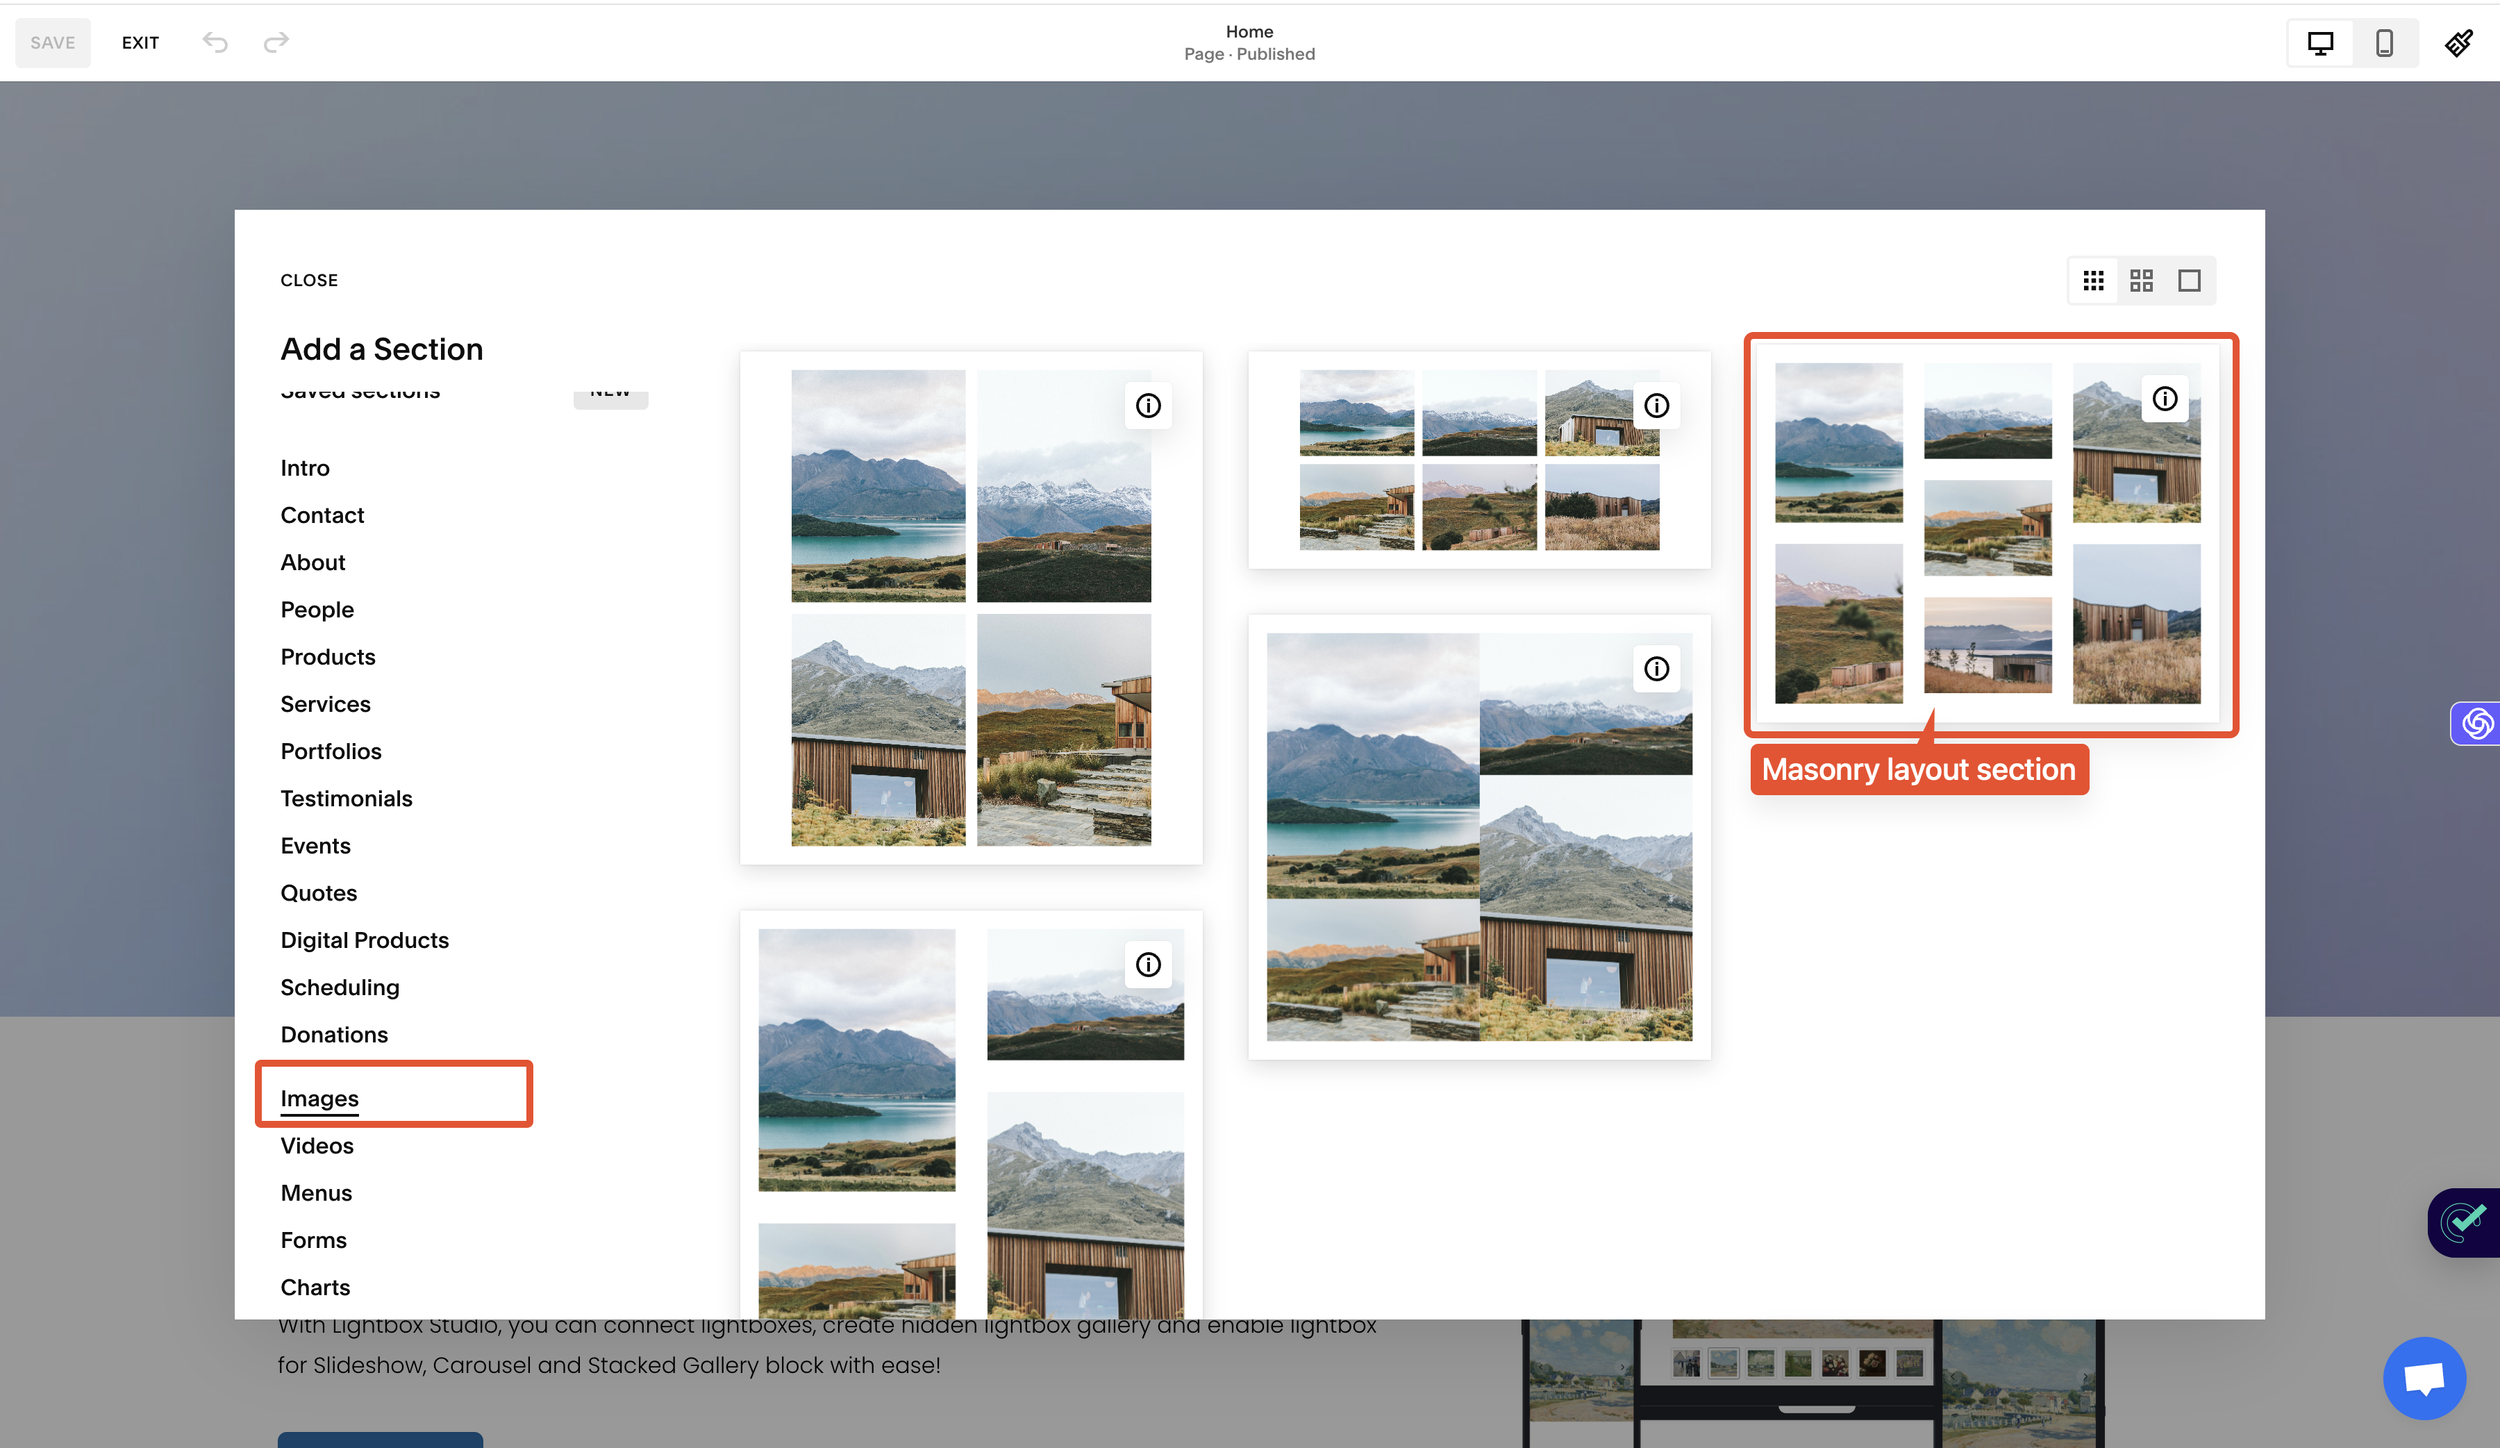
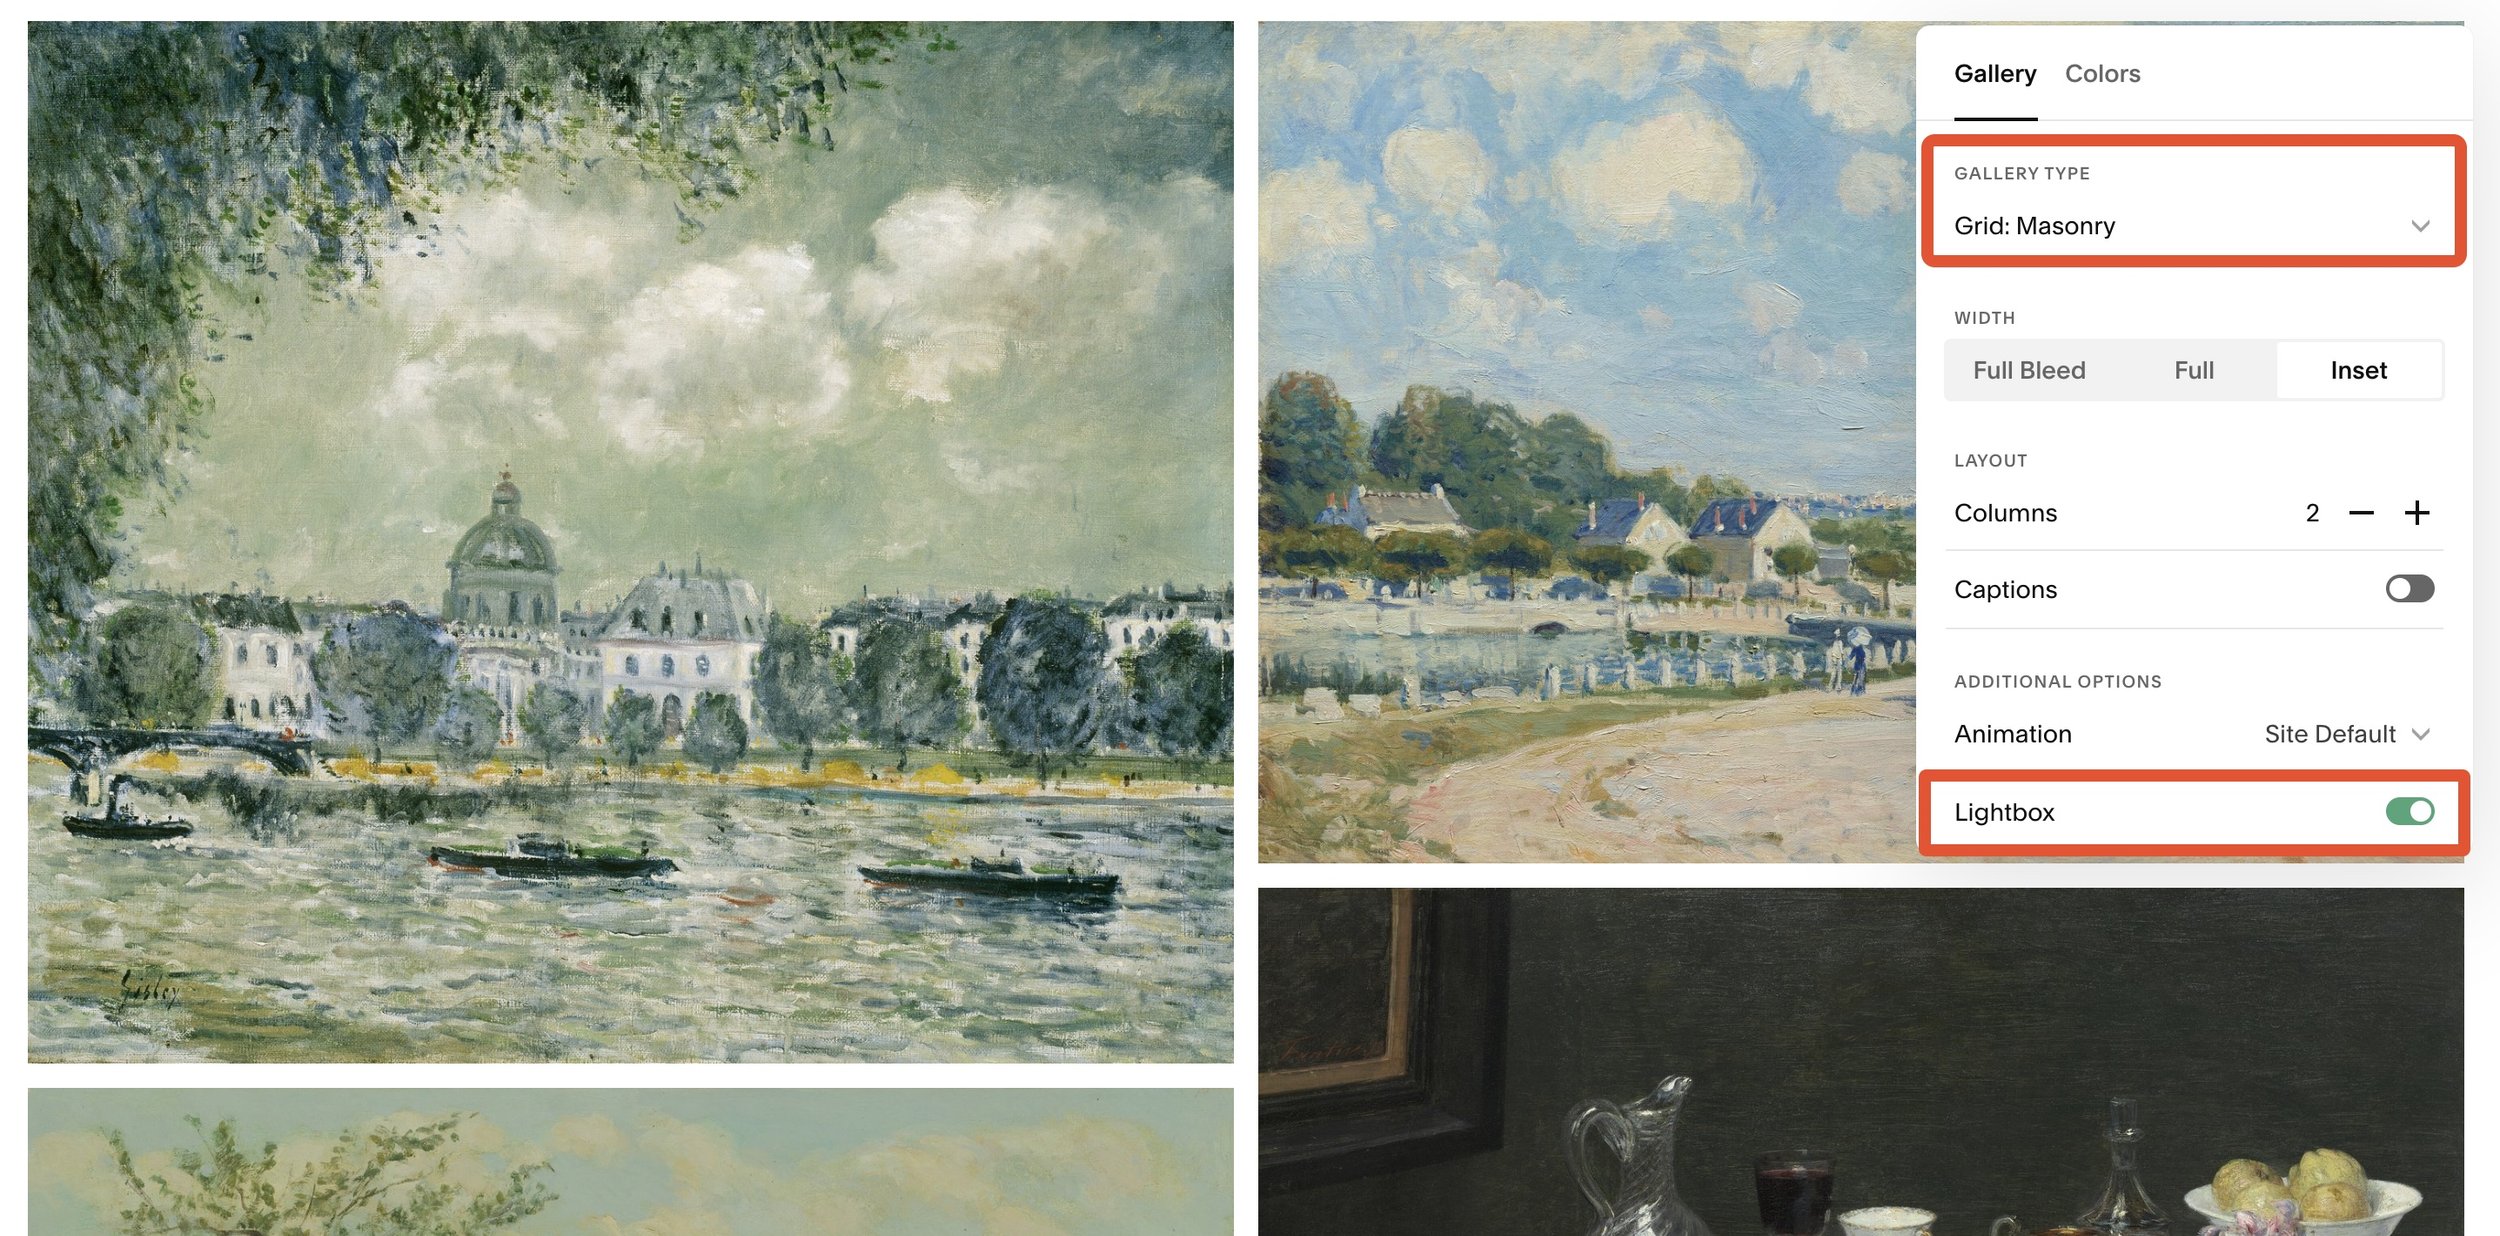
Squarespace Gallery sections has a layout named Grid: Masonry, to insert a Gallery section on an existing page on your site:
Click Edit on the page.
Click Add Section above or below an existing section.
Click Images and choose a layout with an i badge in its top-right corner.
Insert Squarespace masonry gallery section
With this Gallery section layout, you can change the number of columns and spacing of the images, also Lightbox can be enabled to show your images in a enlarged popup. But in this post we are focusing create a Masonry Gallery block, so that we can display it along with other blocks and content such as text blocks, luckily for us, Beyondspace has developed this Freebie Squarespace plugin that allows display Gallery section inside a code block.
The details steps can be found on Gallery block workaround
Create the Masonry Gallery section
Grab its ID
Replace the ID in the Code snippet and put it inside a Code block
That’s it! Now your Gallery section now can stays inside another section along with other blocks
For this method to work, you will a Business plan or higher to place the custom code injection.
Enable lightbox for Masonry section
Squarespace's Masonry section layout supports lightbox functionality, both with the built-in Squarespace lightbox and the Lightbox Studio plugin. Here's how to enable it:
Edit the Page: Navigate to the page containing the gallery you want to update.
Open Section Settings: Hover over the gallery section and click Edit Section.
Set the Layout: Ensure the gallery layout is set to Grid: Masonry and the Lightbox option is checked.
Save and Preview: Save your changes, then preview the page to see your lightbox-enabled gallery in action.
Masonry section enable lightbox
Method 3: Using paid plugin
With a small fee, you can use the plugin Masonry Style Squarespace Gallery Plugin to create a Squarespace masonry gallery layout to your Gallery block, beside the price paid for the plugin, you will also need a Business plan or higher.
Masonry style Gallery block
This Squarespace masonry gallery plugin is a convenient and cost-effective solution for those who want to add a masonry gallery to their Squarespace website without writing custom code.
Enable Lightbox for Masonry Block Layout in Squarespace
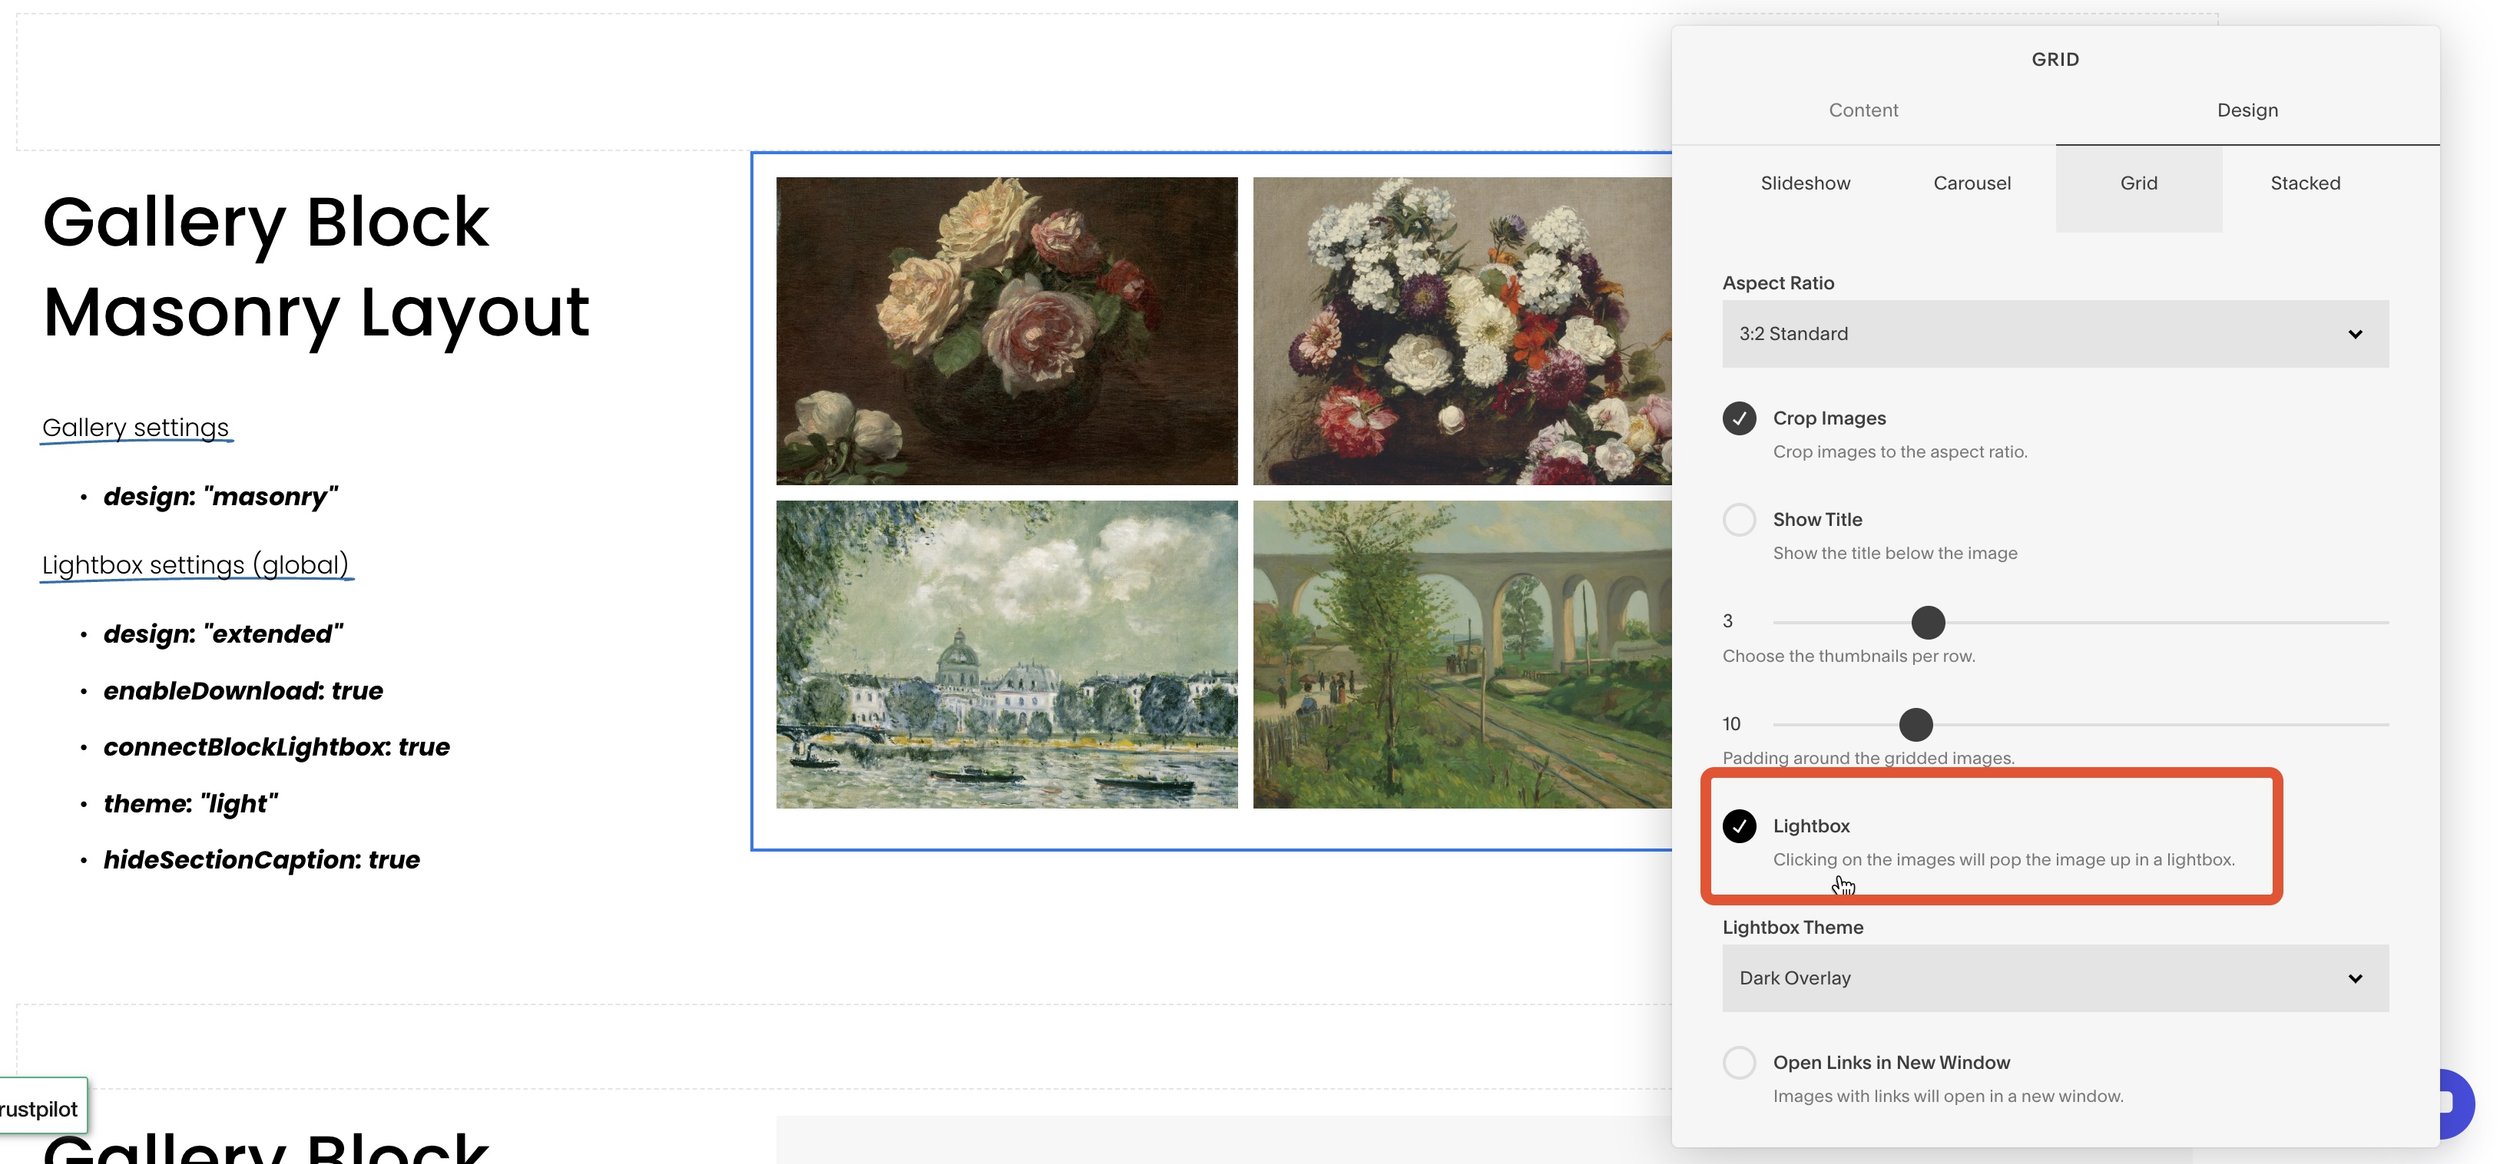
The Masonry gallery block layout in Squarespace is a type of Grid layout, making it easy to enable the lightbox feature. Here's how:
Add or Edit a Gallery Block: Add a new Gallery Block or double-click an existing one to open the gallery editor.
Go to the Design Tab: In the editor, click the Design tab.
Set the Layout: Ensure the layout is set to Grid, as other layouts don’t support lightbox functionality.
Make sure Lightbox option is CHECKED
Choose a Lightbox Style: Select your preferred slideshow style from the drop-down menu: Dark Overlay or Light Overlay.
Masonry block enable lightbox
Summary
I’ve put together a table to compare those solutions
| Method | Price | Columns | Squarespace Plan | Maximum Displayed Images |
|---|---|---|---|---|
| Using Summary Block | Free | Flexible | Personal | 30 |
| Using Gallery Section | Free | Flexible | Business | 250 |
| Using Paid Plugin | Small fee | Flexible | Business | 250 |
Pro tip: Raises the item limit on Masonry (Wall) Summary blocks from 30 to 250 using Lazy Summaries
FAQs on Masonry Gallery block
Question: Can I enable lightbox for Masonry Gallery layout
Except Solution 1 with Wall Summary block, you can enable lightbox for the Gallery blocks and Gallery sections in the two later method, and those Galleries are fully compatible with Lightbox Studio - Premium Squarespace lightbox zoom plugin, allow you to pinch-to-zoom your gallery images on the lightbox and provide extra features like thumbnails and download
Question: I can not insert a Gallery block on my Squarespace 7.1 template
I feel you! That why I created a Freebie Squarespace plugin Classic Gallery block to help you overcome that limitation and insert the Gallery block to your Squarespace 7.1 sections


